Introduction
There is something quietly remarkable about paper.
Of all the materials available to the home decorator — timber, stone, metal, fabric — paper is the most ancient, the most accessible, and in the right hands, the most surprisingly beautiful. It is the material that transforms with the most dramatic return on the smallest investment, that carries the most personal signature of any handmade object, and that brings to a wall not simply a decorative element but genuine evidence of a creative mind and a caring hand.
DIY paper crafts decoration wall art has evolved far beyond the simple origami and collage of earlier craft traditions. In 2025, paper wall art occupies a sophisticated and genuinely aspirational space in contemporary home design — where the handmade quality of paper crafting meets the considered aesthetic intelligence of premium interior styling to create wall features of real, lasting beauty.
The ideas on this list are those that look most beautiful, require the most achievable skill level, and integrate most naturally into the kind of well-designed, genuinely personal home environment that the best interior inspiration always celebrates. Each one is explored with the practical detail, the aesthetic context, and the interior styling guidance that genuinely useful home decor content always provides.
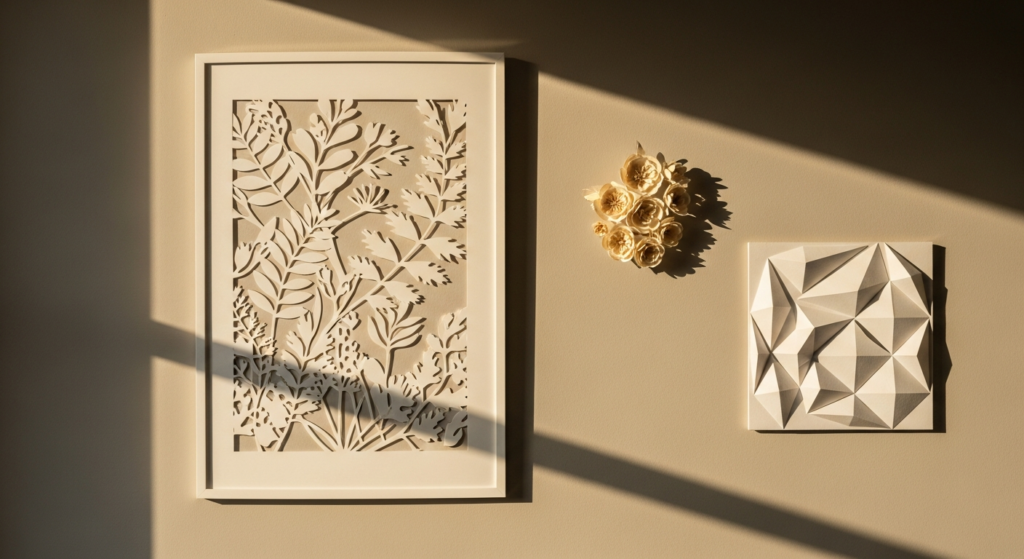
1. Large-Scale Botanical Paper Cut Wall Art
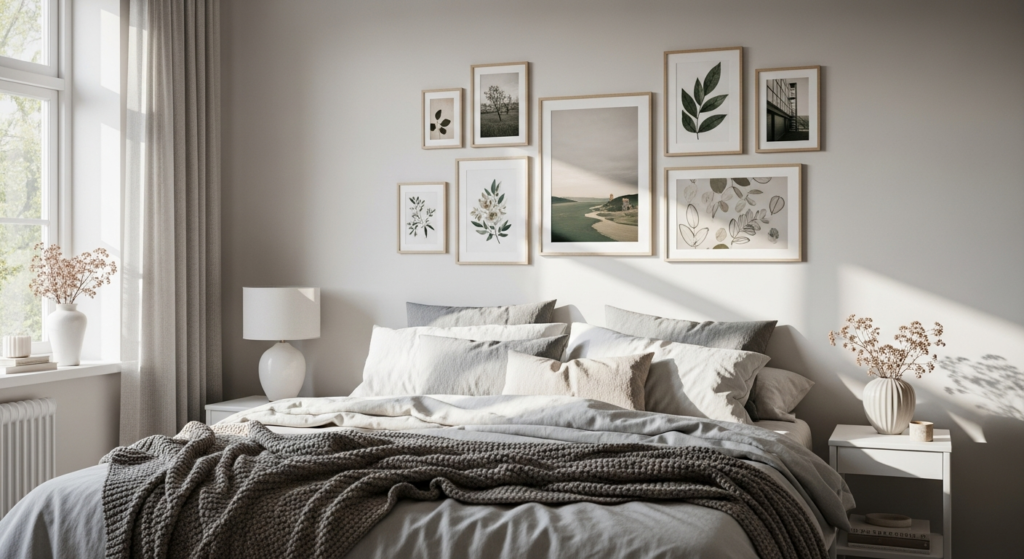
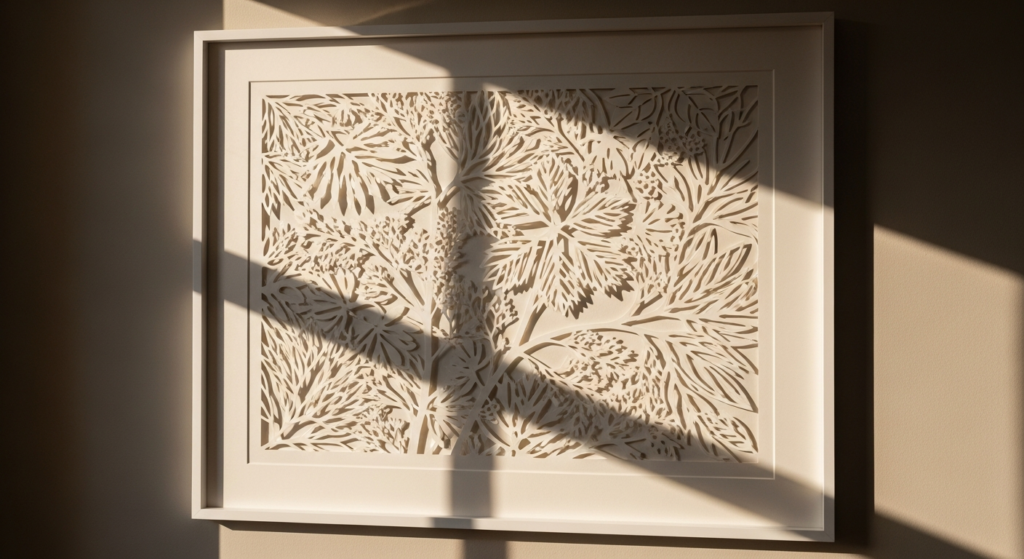
Large-scale botanical paper cutting — where intricate leaf, floral, and branch forms are cut from quality paper and mounted or framed to create dramatic, organic wall features — is the most immediately impactful and the most widely admired of all DIY paper crafts decoration wall art approaches. When scaled generously and mounted with care, paper cut botanical art creates a wall presence comparable to expensive printed artwork.
Styling Tip: Choose a quality white or ivory watercolour paper or a thick, smooth card stock for botanical paper cutting — the slight texture of watercolour paper adds a beautiful dimensional quality when the cut is held in natural light. Scale your botanical design generously — a single large botanical cut filling most of a standard frame creates far more visual impact than several small cuts in the same frame. Mount in a deep frame with a generous mat border — the shadow created between the paper cut and the backing board adds depth and dimension that significantly elevates the finished result.
Hang in a room with directional natural light — the shadows cast through the cut botanical forms change throughout the day, creating a living, dynamic quality that static printed art cannot replicate.
2. Paper Flower Wall Installation
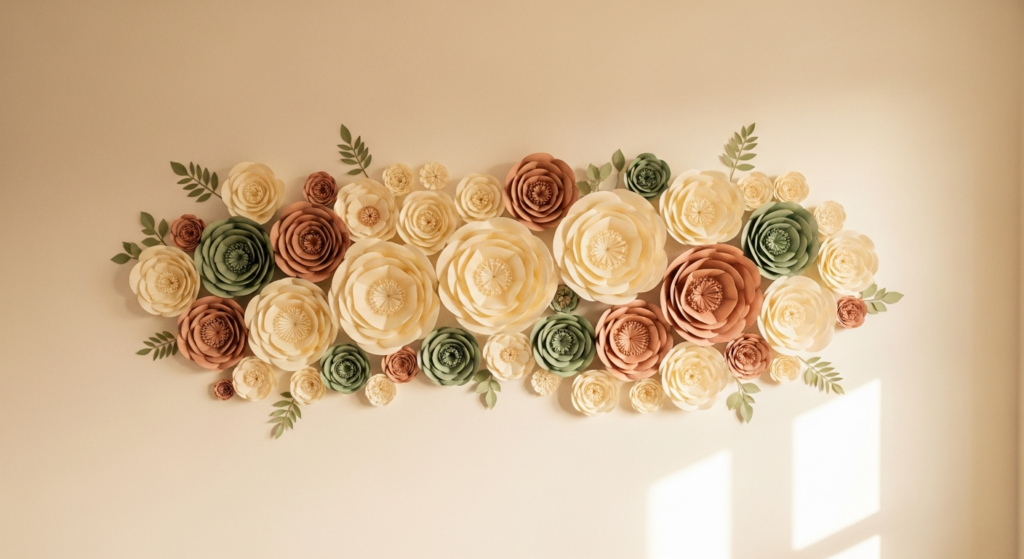
A wall installation of handmade paper flowers — in varying sizes, from small delicate blooms to large architectural flower forms — creates one of the most joyfully beautiful and the most impactful DIY paper crafts decoration wall art moments available. Paper flowers in quality materials carry a tactile, three-dimensional beauty that transforms any wall into a genuine design feature.
Styling Tip: Use quality crepe paper, Italian tissue paper, or heavyweight origami paper for the most beautiful and the most realistic paper flower results — these materials hold their form, accept paint or dye beautifully, and photograph with a richness and depth that standard craft paper cannot achieve. Group paper flowers in odd numbers and varying sizes — three large anchor flowers surrounded by five to seven medium and small blooms creates the most natural and the most visually resolved wall flower composition. Choose a palette of two to three colours within the same tonal family — all warm neutrals, all soft pastels, or all rich jewel tones — for the most cohesive and the most premium-looking result.
Mount using removable adhesive strips or thin wire loops attached to the wall so individual blooms can be repositioned and the composition can evolve over time.
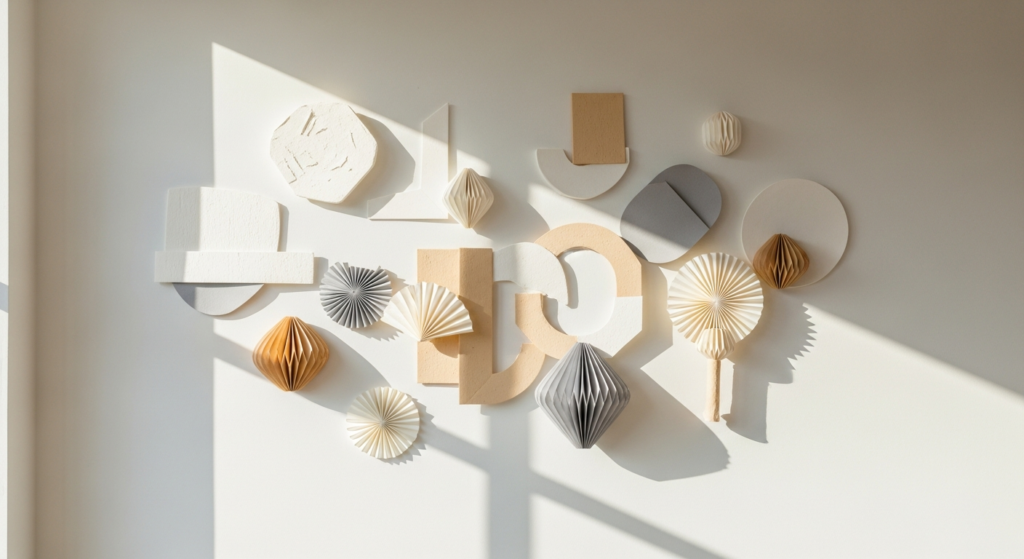
3. Geometric Paper Relief Wall Panel
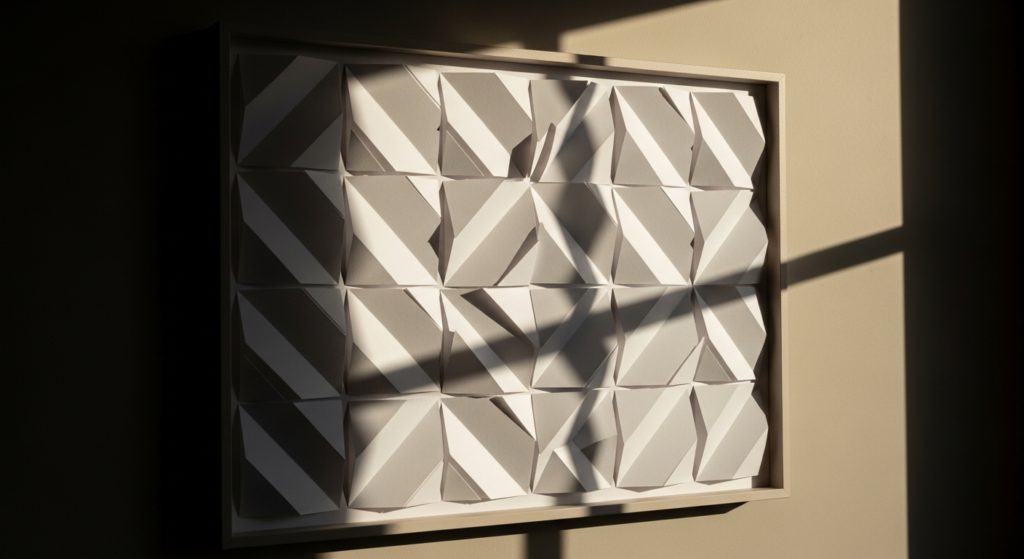
Geometric paper relief — where folded, scored, and layered paper creates a three-dimensional surface pattern on a backing panel — is the most architecturally sophisticated of all DIY paper crafts decoration wall art approaches. When mounted and lit correctly, geometric paper relief panels create shadows and light interactions of genuine, gallery-quality beauty.
Styling Tip: Use a heavyweight smooth white card stock — at minimum 200 gsm — for geometric paper relief panels to ensure the folded forms hold their shape and cast clear, defined shadows. Score all fold lines with a bone folder before folding for the crispest, most precise edges. Mount the finished relief panel in a shadow box frame or on a simple canvas stretcher bar, ensuring at least two centimetres of depth between the paper surface and the frame’s front glass or edge — this depth is what allows the relief’s shadows to be fully visible and most beautiful.
Position a directional light source — a wall sconce, a directed picture light, or simply a room with strong directional natural window light — adjacent to the panel rather than directly in front of it. The shadows created by even small paper relief forms under directional light are dramatically beautiful and transform the piece entirely.
4. Washi Tape Paper Collage Wall Mural
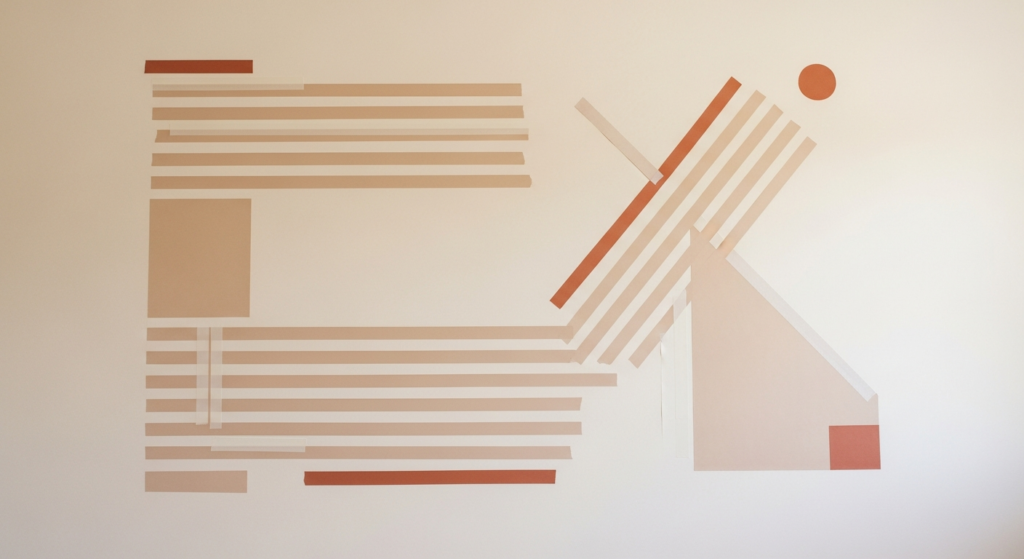
A large-scale washi tape paper collage — combining torn or cut paper elements with coloured and patterned washi tape in a composition that covers a significant portion of a wall — creates one of the most playful, most personal, and the most uniquely individual of all DIY paper crafts decoration wall art approaches. Each piece is inherently unrepeatable and genuinely personal.
Styling Tip: Choose a washi tape palette in a carefully controlled colour family — warm neutrals with one or two accent tones, or a monochromatic arrangement in varying values of a single colour — for the most cohesive and the most genuinely beautiful result. Begin with a simple compositional sketch before applying anything to the wall — identify the overall shape, the distribution of colour, and the areas of negative space within the composition. Allow approximately forty percent of the wall surface to remain bare — negative space in a washi tape wall mural is as important as the composition itself, giving the eye places to rest and allowing the designed areas to breathe.
Apply washi tape in a consistent direction — horizontal lines, diagonal lines, or geometric forms — for the most resolved and the most architectural compositional quality.
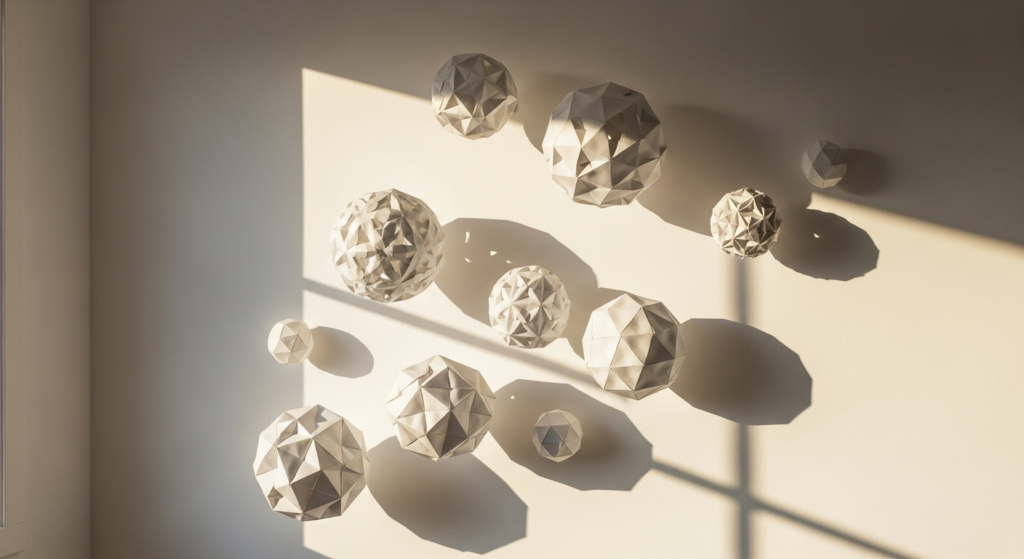
5. Origami Modular Wall Sculpture
Modular origami — where multiple folded paper units are connected to create larger three-dimensional forms — creates one of the most technically impressive and the most visually striking DIY paper crafts decoration wall art possibilities available. A collection of modular origami forms — spheres, polyhedra, stars — mounted together on a wall creates a sculptural installation of genuine, considered beauty.
Styling Tip: Choose a restrained paper palette for modular origami wall sculpture — all white, all ivory, or two closely related tones — for the most sophisticated and the most cohesive installation result. The three-dimensional form of well-made modular origami carries sufficient visual interest without the added complexity of multiple colours. Arrange the individual forms in a composition that has a clear visual logic — a gradually decreasing size from a central large form outward, a constellation-like scattered arrangement with intentional negative space, or a controlled geometric grid.
Mount each form using a single small Command strip or a fine wire loop attached to the wall — the forms should appear to float slightly from the wall surface rather than sitting flat against it, creating the depth and shadow that makes sculptural wall installations most beautiful.
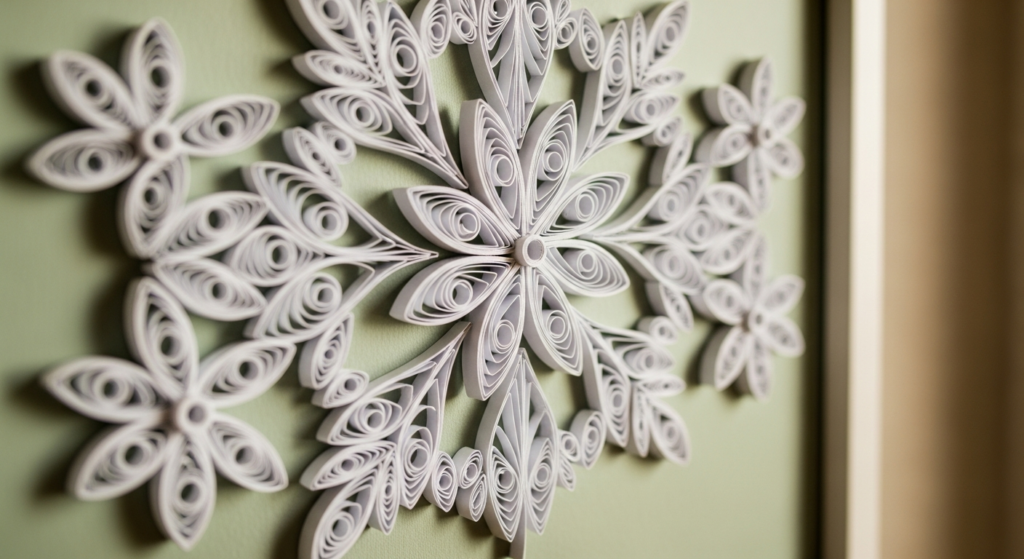
6. Paper Quilling Art Framed Piece
Paper quilling — the art of rolling thin strips of paper into coiled forms and arranging them to create intricate patterns, images, and designs — is the most painstaking and the most genuinely artisanal of all DIY paper crafts decoration wall art techniques. A well-executed quilled piece carries a delicacy and a richness of detail that makes it genuinely indistinguishable from professional decorative art.
Styling Tip: Begin paper quilling with a simple, geometric design rather than complex figurative imagery — repeating circular coil patterns, simple floral forms, or abstract spiraling compositions are both more achievable and, ultimately, more elegant than overly literal designs. Use a quality quilling paper in 3mm width for the most refined results — wider strips create bolder, less delicate forms. Choose a backing paper colour that creates clear contrast with the quilled design — a deep navy, warm terracotta, or soft sage backing makes cream or white quilled forms appear most beautifully dimensional.
Frame under glass with a substantial mat board border — quilling is extremely delicate and requires the protection of a proper glass frame for both preservation and the most elegant presentation quality.

7. Paper Layered Shadow Box Art
Layered paper shadow box art — where multiple sheets of cut paper at varying depths within a deep frame create a sense of three-dimensional perspective and atmospheric depth — is one of the most visually magical and the most widely admired DIY paper crafts decoration wall art results achievable at home. It creates the impression of a small landscape or scene viewed through a window of extraordinary depth.
Styling Tip: Use five to seven layers of quality white or tonal paper cut to create foreground, mid-ground, and background elements within a deep shadow box frame of at least five to seven centimetres depth. Cut each layer with slightly larger scale forms at the back and progressively smaller and more detailed forms toward the front — this reverse perspective is what creates the convincing sense of receding depth. Introduce a warm LED light strip inside the shadow box’s base or top edge — the warm light pooling through the layered paper creates the most beautiful and the most atmospheric paper shadow box effect, particularly in evening lighting conditions.
Botanical themes — layered forest scenes, mountain ranges, or coastal horizons — create the most universally beautiful and the most widely reproduced paper shadow box wall art compositions.
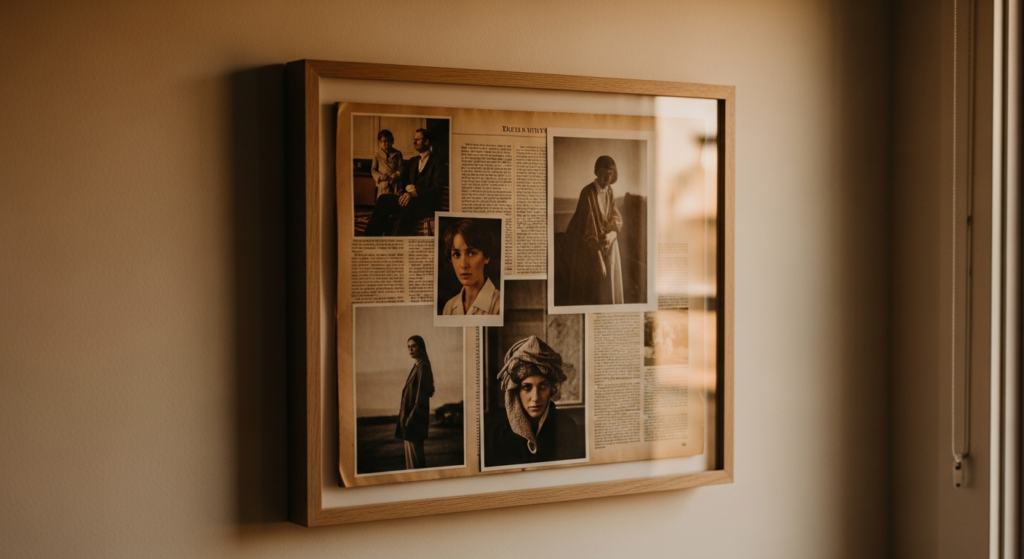
8. Newspaper and Magazine Collage Wall Art
A carefully curated newspaper and magazine paper collage — using vintage pages, quality paper ephemera, and meaningful printed materials in a composition mounted and framed as wall art — creates one of the most personally narrative and the most intellectually interesting DIY paper crafts decoration wall art pieces available. Each collage is a genuinely unique document of personal taste, cultural awareness, and aesthetic sensibility.
Styling Tip: The most elegant magazine and paper collage wall art uses a controlled and consistent visual palette — selecting paper elements that share a similar tonal quality, a similar era of printing, or a similar subject matter for the most cohesive final composition. Avoid the common collage mistake of layering too many competing visual elements at equal weight — establish a dominant layer of background material, a secondary layer of mid-scale elements, and one or two focal pieces at the surface of the composition. Seal the finished collage with a quality matte medium or archival varnish to preserve the paper and to create a unified, professional surface quality.
Frame without glass using a floating frame technique for the most contemporary and the most editorial presentation of a textured paper collage.
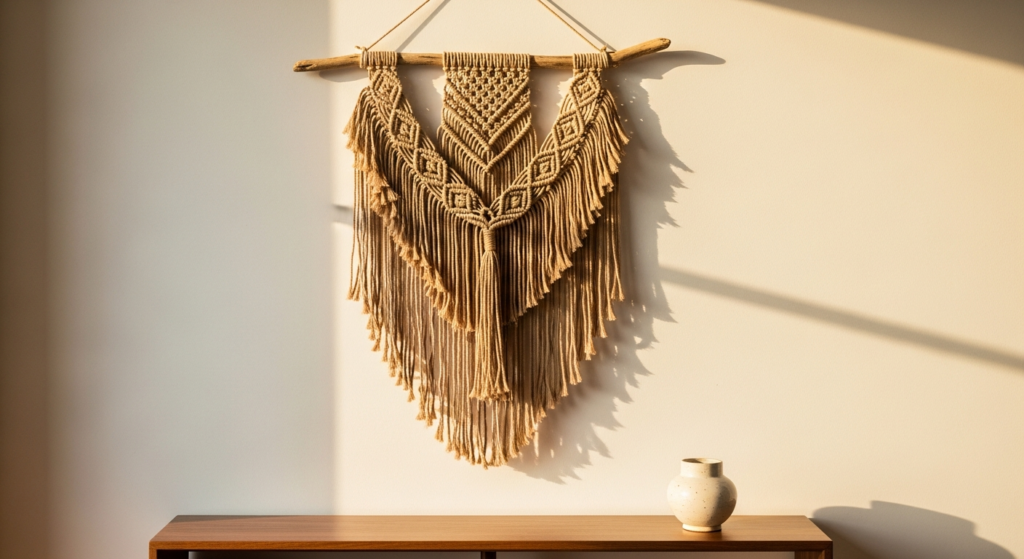
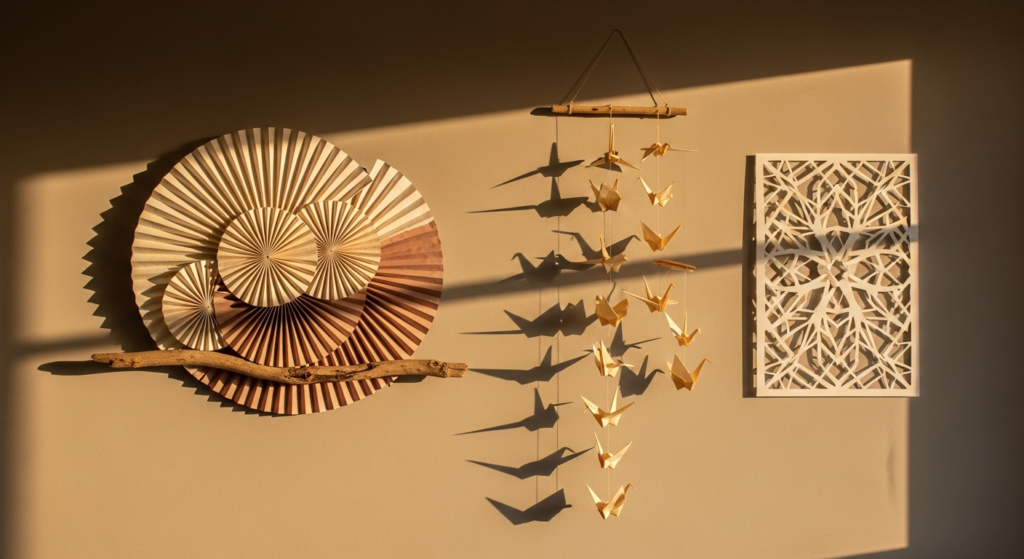
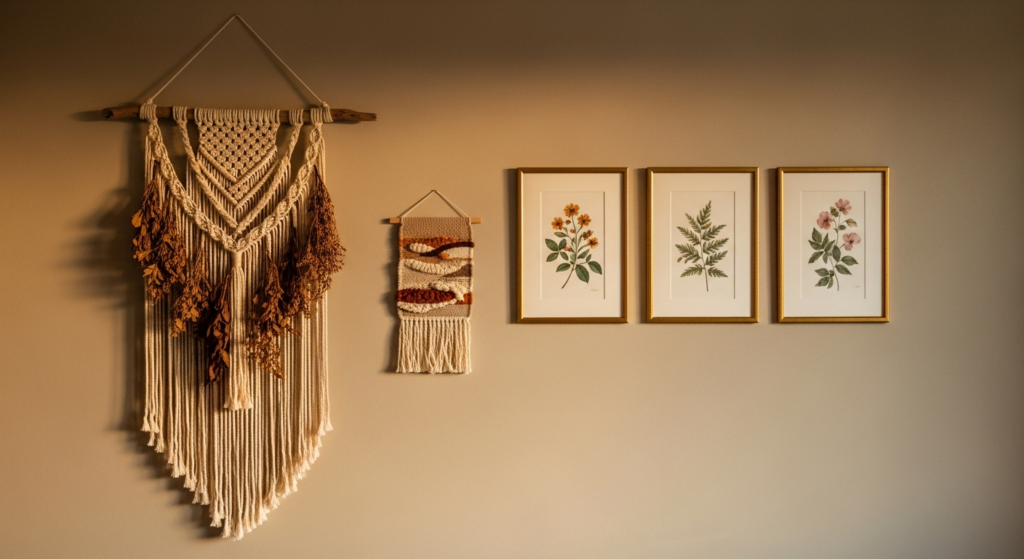
9. Paper Macramé-Style Wall Hanging
A paper macramé-style wall hanging — created by knotting and weaving twisted kraft paper cord, paper rope, or rolled paper strips in the same knotting patterns used in traditional fibre macramé — creates one of the most texturally rich and the most warmly organic of all DIY paper crafts decoration wall art results. The natural colour and the organic texture of kraft paper give paper macramé a warmth and an authenticity that closely resembles genuine natural fibre work.
Styling Tip: Use a quality twisted kraft paper cord or a paper rope with genuine body and texture — thin, lightweight paper strips will not hold the knotting patterns with sufficient definition. Mount the hanging on a quality timber dowel or a length of natural driftwood for the most organic and the most visually resolved finish. Allow the lower fringe of the hanging to fall in natural, uneven lengths — trimmed to a slight V-shape or a slight diagonal creates the most elegant and the most intentional lower edge without the artificiality of a perfectly straight cut.
Paper macramé wall hangings look most beautiful in warm, earthy interior settings — rooms with natural timber, linen textiles, and warm neutral palette will integrate a paper macramé piece most naturally and most beautifully.
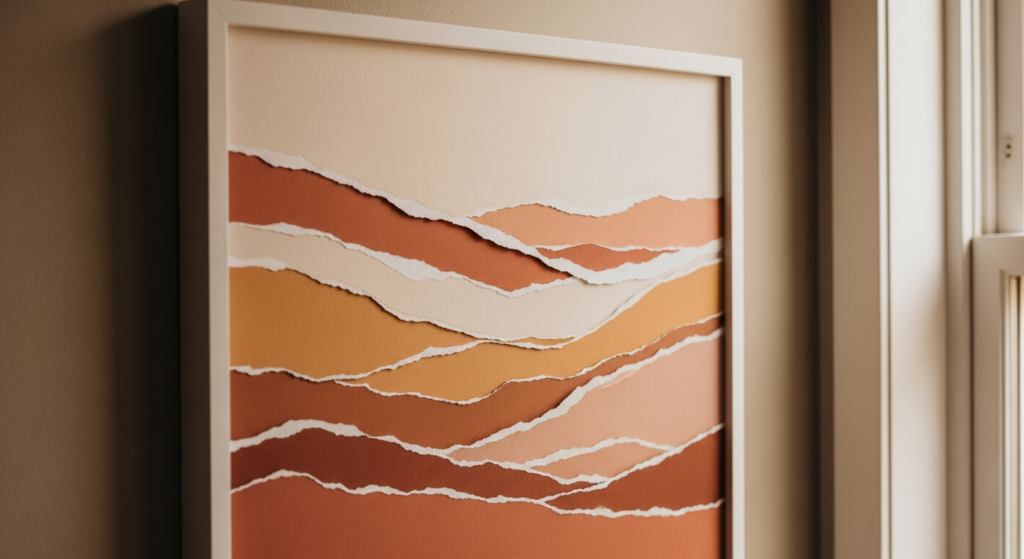
10. Torn Paper Abstract Landscape Wall Art
A torn paper abstract landscape — created by layering torn strips and sections of coloured or painted paper to create horizon lines, sky gradients, and organic abstract forms — is the most painterly and the most expressively artistic of all DIY paper crafts decoration wall art techniques. When executed with a restrained, considered colour palette, a torn paper landscape has the quality of a genuine abstract painting.
Styling Tip: Choose a colour palette of three to five tones within the same colour family — warm terracottas and ochres for a sunset landscape, cool blues and soft whites for an atmospheric sky scene, or warm neutrals and earthy browns for a minimal desert landscape. Tear paper rather than cutting it — the irregular, slightly fibrous edge of torn quality paper creates the most organic and the most naturally beautiful horizon lines and form transitions. Use watercolour paper or quality tissue paper for the most beautiful tearing results. Layer from background to foreground, adhering each torn layer with a quality matte medium applied thinly beneath and over each piece.
Frame under glass in a simple, clean frame that allows the paper textures and the tonal gradients of the landscape to be the complete visual story.

11. Folded Paper 3D Letter and Word Wall Art
Large-scale folded paper letters — each letter individually folded from a single sheet of quality paper in a faceted, geometric style — mounted on a wall to create a personalised word, initial, or short phrase, create one of the most uniquely personal and the most architecturally interesting DIY paper crafts decoration wall art approaches available. When lit correctly, the folded facets of each letter create a constantly shifting pattern of light and shadow.
Styling Tip: Use a heavyweight white or ivory card stock of at least 300 gsm for folded paper letters — lighter paper will not hold the sharp folded edges required for the most beautiful faceted result. Scale each letter generously — individual letters of at least fifteen to twenty-five centimetres in height create the most visually impactful wall installation. Mount letters with a small gap between each for visual breathing room and to allow each letter’s three-dimensional shadow-cast quality to be fully appreciated individually.
Position a warm directional light — a track light, a directed floor lamp, or strong natural window light from the side — adjacent to the letter installation to maximise the shadow-casting quality of the folded facets. The shifting shadows across folded paper letters in changing light conditions throughout the day create a dynamic, living wall art installation of genuine and consistently beautiful quality.
Conclusion
DIY paper crafts decoration wall art is the home design practice that proves most clearly that the most beautiful things in a space do not require the largest budgets or the most specialised skills — they require genuine creative intention, the willingness to invest time and care in the making, and the design intelligence to know where and how to display what has been made.
The eleven paper wall art ideas explored here cover the full range of what this extraordinary medium makes possible — from the architectural sophistication of geometric paper relief and modular origami sculpture to the personal warmth of torn paper landscapes and paper flower installations, from the delicate artistry of paper quilling to the narrative richness of magazine collage. Each one is achievable. Each one is beautiful. And each one carries in its handmade quality something that no purchased print or manufactured artwork can replicate — the unmistakable presence of a specific, caring, creative human hand.
Your walls are waiting. These eleven ideas will give them something genuinely worth looking at.
FAQs
Q1: What are the easiest DIY paper crafts decoration wall art ideas for beginners? The most accessible DIY paper crafts decoration wall art ideas for beginners include large botanical paper cutting — which requires only scissors, a craft knife, and quality paper — paper flower wall installations using crepe or tissue paper, washi tape paper collage murals, and torn paper abstract landscape art. These techniques require minimal specialist equipment, produce beautiful results even on first attempts, and can be scaled to suit any wall size or room aesthetic. Paper quilling and modular origami require more patience and practice but are entirely achievable for dedicated beginners with good tutorials and quality materials.
Q2: What paper materials work best for DIY wall art decoration? The best paper materials for DIY wall art decoration include quality watercolour paper for botanical cuts and torn landscapes — its slight texture adds depth and beauty; heavyweight smooth card stock of 200 to 300 gsm for geometric relief and folded letter work; quality crepe paper or Italian tissue paper for paper flowers; twisted kraft paper cord for macramé-style hangings; and archival quality paper in varied weights for collage and quilling work. In all cases, quality of paper material is the single most important factor in the final aesthetic quality of the finished piece — investing in better paper delivers dramatically better results than attempting professional techniques with craft-store basic materials.
Q3: How do I hang and display DIY paper wall art without damaging the walls? The most effective and least damaging methods for hanging DIY paper wall art include Command adhesive strips in appropriate weight ratings for framed pieces, fine picture wire with small hook adhesive strips for hanging modular origami and paper flower installations, a single quality nail with a picture hook for heavier framed pieces, and removable adhesive putty for direct-to-wall paper elements that may need repositioning. For paper pieces that are not framed, consider mounting on a quality foam board or thin timber panel first — this creates a rigid backing that is easier to hang cleanly and protects the paper from the wall surface’s texture and moisture.
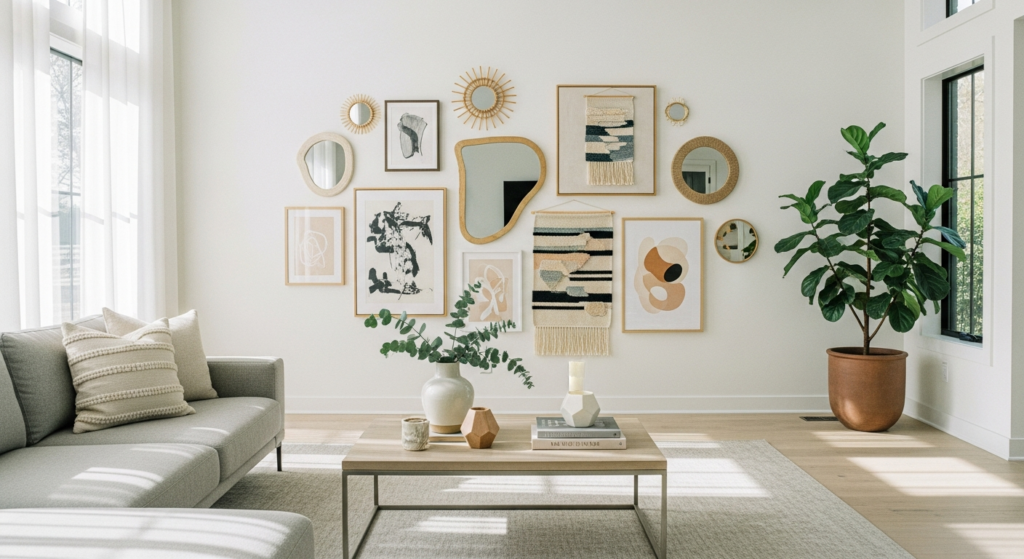
Q4: What interior styles work best with DIY paper crafts decoration wall art? DIY paper crafts decoration wall art integrates most beautifully into interior styles that value handmade quality, natural materials, and warm personal character — Japandi, Scandinavian, organic modern, bohemian, and warm minimal aesthetics all provide the most complementary settings for paper wall art. White paper relief panels and modular origami sculptures work most naturally in minimal and Scandinavian interiors; paper flower installations and macramé-style hangings suit bohemian and organic modern settings most beautifully; botanical paper cuts work across virtually every interior style with equal elegance when framed appropriately.
Q5: How do I preserve and maintain DIY paper wall art over time? DIY paper wall art is best preserved by positioning it away from direct sunlight — UV exposure will fade and yellow most paper materials within months of sustained exposure. Avoid hanging paper art in rooms with high humidity — bathrooms and some kitchen positions will cause paper to warp, buckle, or deteriorate over time. Dust paper wall art gently with a clean, dry soft brush rather than a damp cloth. For collage and layered paper pieces, applying a quality matte archival varnish over the finished surface significantly extends the piece’s life by protecting it from dust, moisture, and UV damage while maintaining the paper’s natural, matte texture quality.